iPhone backup: before iOS 10 updates
Before iOS 10 updates, it’s much safer when you have your iPhone backup. This will avoid unfortunate data loss when something goes wrong in the process, especially if you update via OTA. Surprisingly, there are more than just one way to do it.
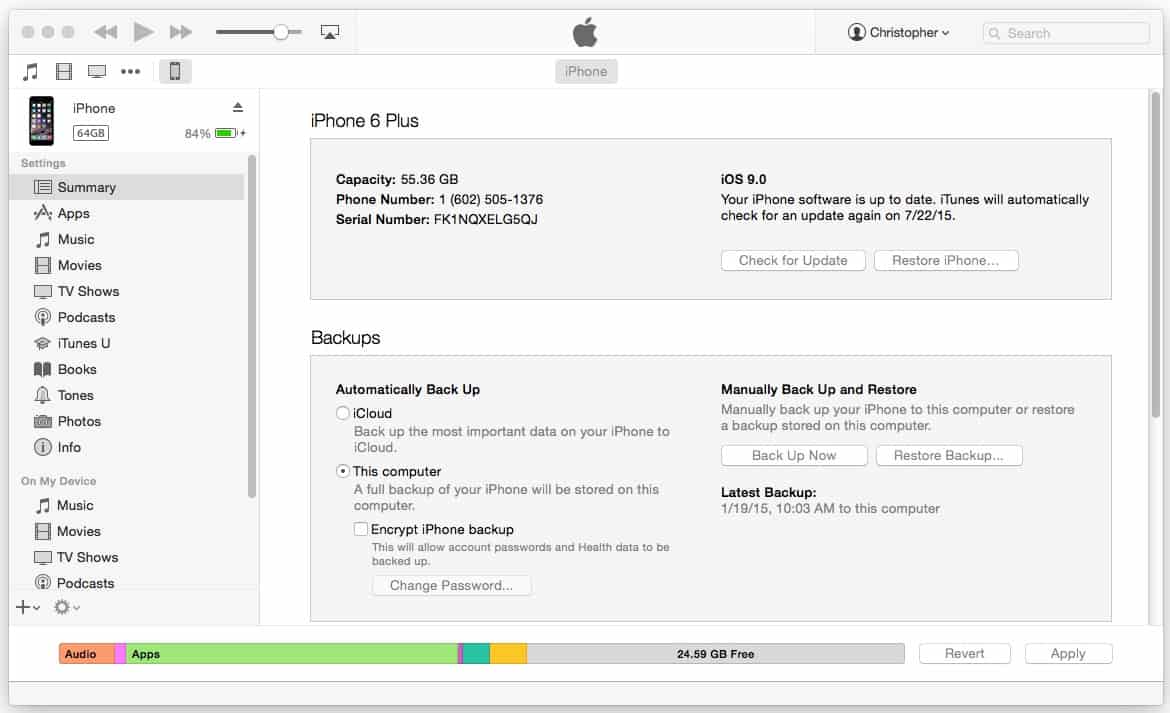
1. iPhone backup : save data on PC using iTunes
In the first step of your iPhone backup method, you need to connect your phone to your computer by using a USB sync cable. When you finish, you may see a “Trust computer” confirmation pop-up. Choose “Yes” and then click the phone icon on the left corner. This will bring up the summary screen. Tick in the box “Encrypt iPhone backup” which will help you save all the passwords, apps, and websites. Then you come to the last step: click the “Back up now” button lying in the “Manually back up and restore” section. Even though you may take a few step, the whole process will only take you only 30 seconds. Consuming little time is the biggest advantage when you use this method.
The step above is only suitable for those having not set auto sync for your computer. If you have already set it, your computer will launch iTunes and start the backup process by itself, automatically. It may take you only around a minute to do the whole process. However, there are some cons about this backup method. This method only allows you to back up everything in your phone. Therefore, you cannot choose a specific file to save if you want to. Plus, you cannot see the actual data in your backup files. Still, these cons are not a big deal at all since the method has executed the main purpose: back up all the data on your iPhone.
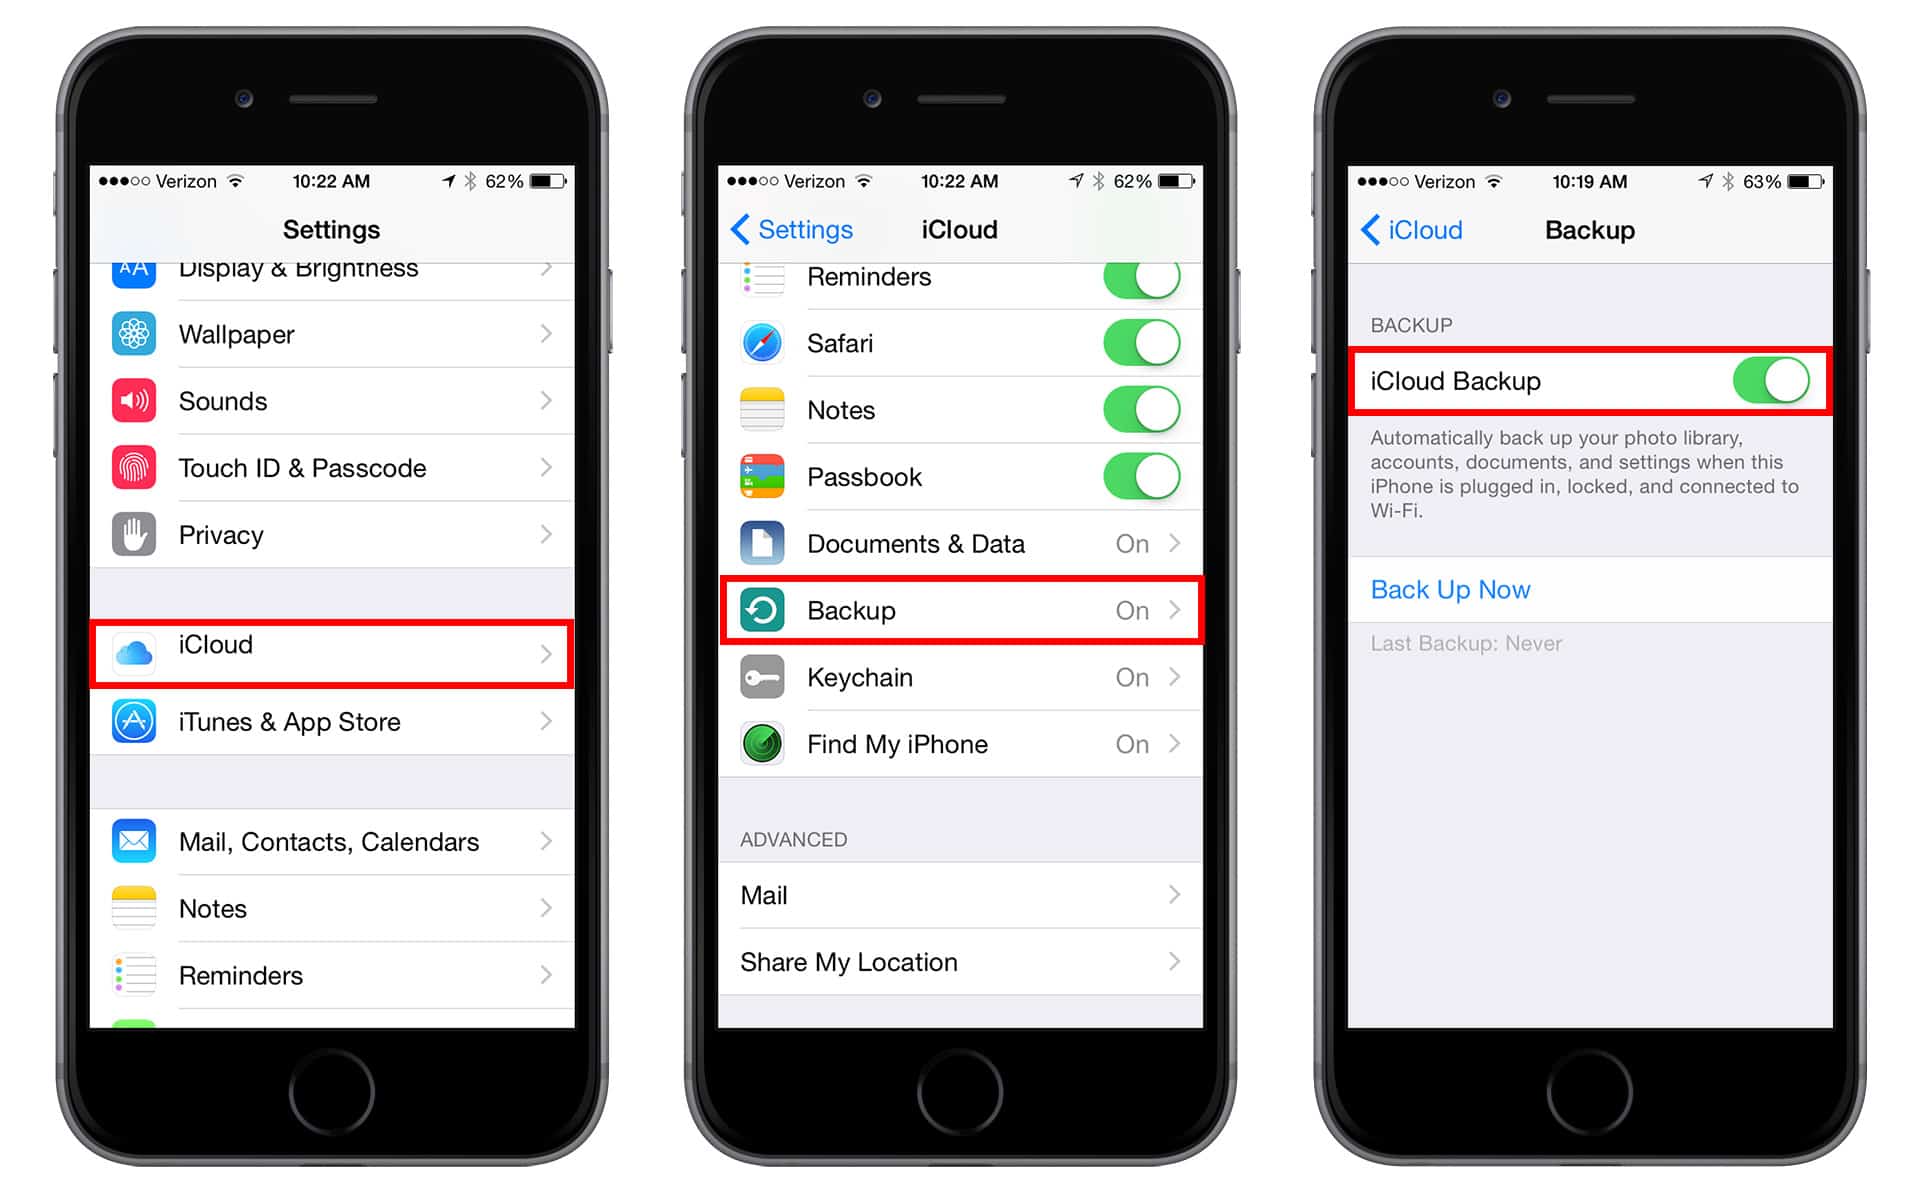
2. iPhone backup: iCloud
With this method, all you need is your phone and a good wifi connection. Turn on your wifi and then go to iCloud in the “Settings” section. Choose “iCloud” and tap on “Backup”. Slide to enable “iCloud Backup” option. Now all you need to do is to make sure you stay connected to wifi and wait for the process to finish. This method is a bit more convenient since you do not need any other device. However, it shares the same cons with iTunes back up. You are not allowed to choose or see the backup data.
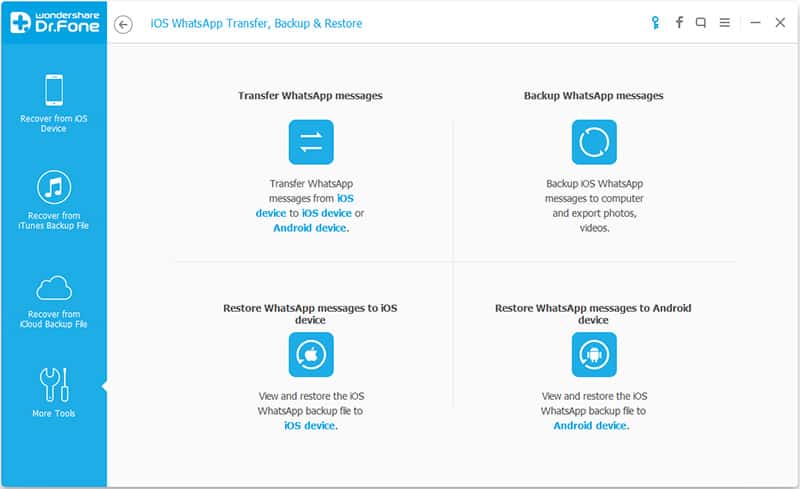
3. iPhone backup: Dr. Fone
Dr. Fone is a great program to help your iPhone backup. Unlike other methods, you can choose which files you want to back up. All you need to do is launch this program on your computer, then follow these steps: Device Data Backup & Export> Backup. The process takes around 5 minutes. When you are waiting for the backup to finish, you can do some chores or listen to some music.
iPhone backup: avoid data lost
Backing up your phone is a real serious matter that should never be neglected. If you lose all your data after an iOS upgrade, all your precious information will never ever be recovered without backup. Don’t let this happen to you! Do your iPhone backup properly!
You May Like
-
 Sony Xperia Ultra Max Pro Specs: 200MP Cameras, 19100mAh Battery!
-

-
Nokia Joker 2026 Specs: 200MP Cameras, 9800mAh Battery!
-
Nokia Horizon 2026 Specs: 200MP Cameras, 12800mAh Battery!
-
 Nokia Titan 2026 Specs: 16GB RAM, 9700mAh Battery!
-
Redmi Note 15 Series Goes Global With 200MP Cameras, 6580mAh Battery, Price!


